Google社の提案は、お客様のビジネスに対して、全般的にどのような影響をもたらすとお考えになりますか?
って直球!!
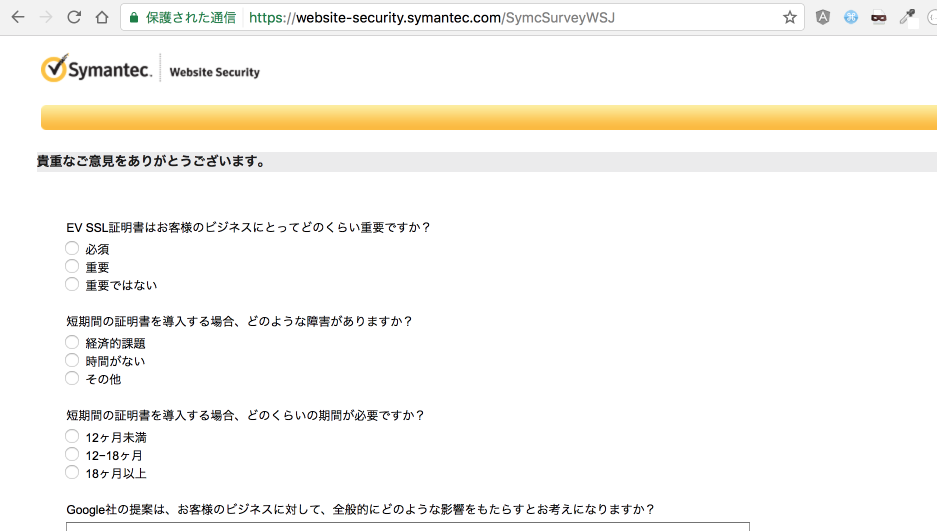
Google社の提案は、お客様のビジネスに対して、全般的にどのような影響をもたらすとお考えになりますか?
って直球!!
AndroidSDKのbuild-toolsにある。
<code>
yuta$ ls ~/Library/android-sdk-macosx/build-tools/
24.0.0/ 24.0.1/ 24.0.2/ 24.0.3/
yuta$ ~/Library/android-sdk-macosx/build-tools/24.0.3/
aapt arm-linux-androideabi-ld lib/ renderscript/
aapt2 bcc_compat lib64/ split-select
aarch64-linux-android-ld dexdump llvm-rs-cc x86_64-linux-android-ld
aidl dx mainDexClasses zipalign
apksigner i686-linux-android-ld mipsel-linux-android-ld
パソコンを久しぶりにセットアップしていて、エディターはSublimeとPeggyをインストールしようとしたらPeggyの販売元のアンカーシステム(今は株式会社エスコアハーツなのかな?)のHPに「ソフトウェア事業縮小のお知らせ」が・・・
ライセンスは購入していましたが、メールでシリアルコードが届くだけなので、ダウンロードリンクがなくなるとインストールもできません。。。
しかたないので、さくらエディターのカラーコードをそれっぽくしたりしたけどどうも合わないので、NASとかレンサバのディスク探したけどどうしてもPeggyのインストーラーは見つからないので、諦めようかと思っていたら。。
Peggyの公式ページの日本語はGoogleもYahooのキャッシュもダウンロードページにはいけませんが、アンカーシステムのHP右上のEnglish Versionを選択するとまだダウンロードリンクへ進むことができます。
Peggyファンは今のうちに!
広告とかの部分ミスッた?

ロリポップのデーターベース重すぎ。。
と思ったので、同じ金額でぜんぜんましなさくらインターネットのデータベースサーバーを比べて見ました。
書いちゃいけないことがあれば、指摘してください。
適当に選んだDBサーバーの結果なので、感覚値としてみてください。
結果としては、sakuraにしておこうって感じでした。
契約はレンタルサーバーのスタンダートプランで、DBサーバーは「mysql481.db.sakura.ne.jp」でした。
6/10の時点でMySQL サーバの稼働時間は162日で、簡単にこんな感じでした。
さくらインターネットのDBサーバーのクエリキャッシュ設定
[code language=”bash”]
SHOW VARIABLES LIKE ‘query_cache_%’
Variable_name Value
query_cache_limit 4194304
query_cache_min_res_unit 4096
query_cache_size 402653184
query_cache_type ON
query_cache_wlock_invalidate OFF
[/code]
さくらインターネットのDBサーバーのコミット設定
ロリポップのDBも同じ設定でした。
[code language=”bash”]
SHOW VARIABLES LIKE ‘innodb_flush_log_at_trx_commit%’
Variable_name Value
innodb_flush_log_at_trx_commit 1
[/code]
さくらインターネットのDBサーバーのコネクション設定
ロリポップよりMaxが多い
[code language=”bash”]
SHOW VARIABLES LIKE ‘%connections%’
Variable_name Value
max_connections 300
max_user_connections 30
[/code]
さくらインターネットのDBサーバーのバッファプール設定
ロリポップが12GBに対して、さくらは40GB。
[code language=”bash”]
SHOW VARIABLES LIKE "innodb_buffer%"
Variable_name Value
innodb_buffer_pool_instances 1
innodb_buffer_pool_size 42949672960
[/code]
ロリポは契約延長なしでいきます。
[code language=”bash”]
SHOW VARIABLES LIKE ‘query_cache_%’
Variable_name Value
query_cache_limit 134217728
query_cache_min_res_unit 4096
query_cache_size 1073741824
query_cache_type ON
query_cache_wlock_invalidate OFF
[/code]
[code language=”bash”]
SHOW VARIABLES LIKE ‘innodb_flush_log_at_trx_commit%’
Variable_name Value
innodb_flush_log_at_trx_commit 1
[/code]
[code language=”bash”]
SHOW VARIABLES LIKE ‘%connections%’
Variable_name Value
max_connections 256
max_user_connections 30
[/code]
[code language=”bash”]
SHOW VARIABLES LIKE "innodb_buffer%"
Variable_name Value
innodb_buffer_pool_dump_at_shutdown ON
innodb_buffer_pool_dump_now OFF
innodb_buffer_pool_filename ib_buffer_pool
innodb_buffer_pool_instances 8
innodb_buffer_pool_load_abort OFF
innodb_buffer_pool_load_at_startup ON
innodb_buffer_pool_load_now OFF
innodb_buffer_pool_size 12884901888
[/code]
eclipsが助けてくれるけど、忘れっぽいのでAndroidのCursorについて翻訳してくれているサイトをメモ
Yukiの枝折より
http://yuki312.blogspot.jp/2012/03/androidcursorapi.html
[code language=”java”]
Cursor cursor = db.selectdata();
while( cursor.moveToNext() ){
Log.d( TAG , cursor.getInt(0) );
Log.d( TAG , cursor.getString(1) );
}
[/code]
管理してるサーバーでOpenSSL(Heartbleed 脆弱性) 影響があるかチェックしてみます。
Heartbleedのバグは、インターネット上の誰もがOpenSSLソフトウェアの脆弱なバージョンで保護されているシステムのメモリを読み取ることができます。これは、サービスプロバイダを識別するために、トラフィックを暗号化するために使用される秘密鍵、ユーザ名とパスワードと実際の内容を損なう。これは、攻撃者が、通信を盗聴サービスとユーザーから直接データを盗み、サービスとユーザーを偽装することができます。

適当なサーバーで見てみたら、CentOSのバージョンによっては対象より低いバージョンでした。
[code language=”bash”]
[000@12345 ~]$ rpm -qa | grep openssl
openssl-devel-1.0.0-25.el6_3.1.x86_64
openssl-1.0.0-25.el6_3.1.x86_64
[/code]
ですがupdatesレポジトリーに修正版の「1.0.1e-16.el6_5.7」がアップされているので、適応しておきます。
[code language=”bash”]
====================================================================================================================================================================
Package Arch Version Repository Size
====================================================================================================================================================================
Updating:
openssl x86_64 1.0.1e-16.el6_5.7 updates 1.5 M
Updating for dependencies:
openssl-devel x86_64 1.0.1e-16.el6_5.7 updates 1.2 M
Transaction Summary
====================================================================================================================================================================
Upgrade 2 Package(s)
[/code]
修正バージョンへOpenSSLをアップデートして、OpenSSLライブラリ使ってるサービスを再起動!
特定できなければ、OS再起動しましょう。
OpenSSLは、セキュア·ソケット·レイヤー(SSLのV2/V3 )を実装するツールキットです
トランスポート層セキュリティ(TLS v1)プロトコルだけでなく、
フル強度、汎用暗号化ライブラリ。情報開示の欠陥がOpenSSLはTLSを取り扱い、見つかりました
DTLSハート拡張パケット。悪質なTLSまたはDTLSクライアントまたはサーバ
開示することが特別に細工されたTLSまたはDTLSハートビートパケットを送信することができます
接続されたクライアントまたはサーバからの要求あたりのメモリの限られた部分。
メモリの開示された部分は、潜在的に含まれる可能性があることに注意してください
秘密鍵などの重要な情報。 (CVE-2014 – 0160 )Red Hatはこの問題の報告ためにOpenSSLプロジェクトに感謝したいと思います。
アップストリームは、元のようにGoogleのセキュリティのネールメータを認める
記者。すべてのOpenSSLのユーザは、これらのアップデートパッケージにアップグレードしてくださいいる
この問題を修正するバックポートパッチを含む。更新が反映するために
効果、などのhttpdやその他などのOpenSSLライブラリにリンクされているすべてのサービス(
SSL対応のサービス)を再起動しなければならないか、システムをリブート。
Red Hatのエラータ情報はコチラhttps://rhn.redhat.com/errata/RHSA-2014-0376.html
アカウント情報のページにプライマリ アカウント キー、顧客 IDとかあって翻訳具合が微妙で分かりにくい。
自分ほど英語読めないと顧客 ID=client idだけどOAuthを通らない。
開発者のタブにはクライアント ID、顧客の秘密があってどうやら
[クライアント ID]=[client_id]
[顧客の秘密]=[client_secret]
でOKでした。

まずはビルド環境としてUbuntuの64bit版を必要があるので、VirtualBoxにインストール
親機がVAIOのVPCZ1なのでIntelVTも使えて思った以上にさくさくに動く。
いろんなサイトを参考にしながらスタート。
あまり詳しくわからないが、去年くらいからビルドの方法がかわったっぽい。
tarボールを落としてる人もいれば、repoやgclientの人もいる。
公式サイトはrepoなので公式をもとにChromeOSのビルドをしてみる。
[code language=”bash”]
repo init -u http://git.chromium.org/chromiumos/manifest.git -m minilayout.xml
[/code]
まずは、gitのインストール
[code language=”bash”]
sudo aptitude install git-core gitk git-gui
[/code]
そもそもaptitudeが入っていなかったのでインストールする。
あと他のブログで画像をみてるとcurlを使ってそうなのでインストール
[code language=”bash”]
sudo apt-get install aptitude curl
[/code]
ChromeOSのビルドに必要なもろもろが纏められているのでそれらを配置して実行
[code language=”bash”]
wget http://src.chromium.org/svn/trunk/src/build/install-build-deps.sh
sudo sh install-build-deps.sh
svn co http://src.chromium.org/svn/trunk/tools/depot_tools
export PATH=$PATH:~/depot_tools
[/code]
gclientではなくrepoを使うので、repoのインストール
[code language=”bash”]
sudo su –
curl http://android.git.kernel.org/repo > /usr/bin/repo
chmod a+x /usr/bin/repo
[/code]
本家にならって、ディレクトリ作成し、ChromeOSのソースを取得します。
repo initが完了したら、repo syncで取得を行う。(30分くらいで完了)
[code language=”bash”]
mkdir -p ${HOME}/chromiumos
cd ${HOME}/chromiumos
repo init -u http://git.chromium.org/chromiumos/manifest.git -m minilayout.xml
repo sync
[/code]
repo init で何回か失敗しましたが、.repoディレクトリを消してやり直してたら上手くいきました。
[code language=”bash”]
Initializing project chromiumos/overlays/portage-stable …
remote: Counting objects: 212, done.
remote: Compressing objects: 100% (162/162), done.
remote: Total 212 (delta 32), reused 170 (delta 26)
Receiving objects: 100% (212/212), 123.14 KiB | 97 KiB/s, done.
Resolving deltas: 100% (32/32), done.
From http://git.chromium.org/chromiumos/overlays/portage-stable
* [new branch] 0.12.362.B -> cros/0.12.362.B
* [new branch] 0.12.369.B -> cros/0.12.369.B
* [new branch] 0.12.392.B -> cros/0.12.392.B
* [new branch] 0.12.433.B -> cros/0.12.433.B
* [new branch] 0.13.434.B -> cros/0.13.434.B
* [new branch] 0.13.509.B -> cros/0.13.509.B
* [new branch] 0.13.558.B -> cros/0.13.558.B
* [new branch] master -> cros/master
Fetching projects: 100% (10/10), done.
Checking out files: 100% (1718/1718), done.
Checking out files: 100% (89225/89225), done.files: 12% (11414/89225)
Syncing work tree: 100% (10/10), done.
Your sources have been sync’d successfully.
yuta@yuta-VirtualBox:~/chromiumos$
[/code]
途中で名前やメールアドレスを聞かれますが、適当に入力しました。
また、カラー表示の質問があるので基本「y」入力で答えます。
ソース取得も完了したので、ビルド用のchroot環境の作成に入ります。
これが結構ながくて、また30分くらい待ちました。
まえにUbuntuが手元になかったので、ServerManVPSをUbuntuに再セットアップして試しましたが
まさかのUbuntu32bit選択という落ちで、ここでamd_64じゃないって怒られました。
[code language=”bash”]
yuta@yuta-VirtualBox:~/chromiumos/src/scripts$ ./make_chroot
These are the packages that would be merged, in order:
These are the packages that would be merged, in order:
Calculating dependencies
Fetching bininfo from http://commondatastorage.googleapis.com/chromeos-prebuilt/host/amd64/binary-26.05.11.082024/packages/ http://commondatastorage.googleapis.com/chromeos-prebuilt/host/amd64/full-26.05.11.094812/packages/
!!! Error connecting to ‘http://commondatastorage.googleapis.com/chromeos-prebuilt/host/amd64/binary-26.05.11.082024/packages/ http://commondatastorage.googleapis.com/chromeos-prebuilt/host/amd64/full-26.05.11.094812/packages/’.
!!! Unable to get listing: 400 Server did not respond successfully (400: Bad Request)
Pending 5, Ready 1, Running 1, Retrying 0, Total 211 [Time 13m6.2s Load 0.92 0.85 0.63]
Started virtual/perl-File-Spec-3.30 (logged in /tmp/perl-File-Spec-3.30-cxOyXu)
Completed virtual/perl-ExtUtils-ParseXS-2.20.0401 (in 0m3.9s)
・・・・・
[/code]
完了したら、ビルド用のchroot環境に入ります。
[code language=”bash”]
yuta@yuta-VirtualBox:~/chromiumos/src/scripts$ ./enter_chroot.sh
(cros-chroot) yuta@yuta-VirtualBox ~/trunk/src/scripts $ ./setup_board –board=x86-generic –default
Total: 1 package (1 new, 1 binary), Size of downloads: 0 kB
Portage tree and overlays:
[0] /usr/portage
[?] indicates that the source repository could not be determined
>>> Emerging binary (1 of 1) cross-i686-pc-linux-gnu/glibc-2.10.1-r2 from unknown repo
[/code]
「Initialize the build for a board」ボードターゲットを設定します。
これはそんなにかかりませんでした。
[code language=”bash”]
(cros-chroot) yuta@yuta-VirtualBox ~/trunk/src/scripts $ ./setup_board –board=x86-generic –default
[/code]
やっとここまでで、パッケージのビルド
[code language=”bash”]
(cros-chroot) yuta@yuta-VirtualBox ~/trunk/src/scripts $ ./build_packages
↓↓↓↓↓↓↓↓↓↓↓↓↓↓↓↓↓↓↓↓↓↓↓↓↓↓↓↓
Pending 2, Ready 0, Running 1, Retrying 0, Total 418 [Time 40m49.3s Load 0.54 1.12 0.94]
Pending 2, Ready 0, Running 1, Retrying 0, Total 418 [Time 40m54.3s Load 0.50 1.11 0.94]
Still building autotest-tests-ownershipapi-0.0.1-r194 (2m3.9s). Logs in /tmp/autotest-tests-ownershipapi-0.0.1-r194-WeKa5u
Pending 2, Ready 0, Running 1, Retrying 0, Total 418 [Time 41m4.3s Load 0.50 1.09 0.93]
Pending 2, Ready 0, Running 1, Retrying 0, Total 418 [Time 41m9.3s Load 0.54 1.08 0.93]
Pending 2, Ready 0, Running 1, Retrying 0, Total 418 [Time 41m14.3s Load 0.58 1.08 0.93]
Completed chromeos-base/autotest-tests-ownershipapi-0.0.1-r194 (in 2m22.1s)
Pending 1, Ready 1, Running 0, Retrying 0, Total 418 [Time 41m17.4s Load 0.53 1.06 0.93]
Started chromeos-base/autotest-all-0.0.1-r4 (logged in /tmp/autotest-all-0.0.1-r4-tJaoQX)
Completed chromeos-base/autotest-all-0.0.1-r4 (in 0m3.5s)
Pending 0, Ready 0, Running 0, Retrying 0, Total 418 [Time 41m21.0s Load 0.53 1.06 0.93]
Merge complete
Adding chromeos-base/chromeos to world
Adding chromeos-base/chromeos-dev to world
Adding chromeos-base/chromeos-factoryinstall to world
Adding chromeos-base/factorytest-init to world
Adding chromeos-base/chromeos-test to world
Adding chromeos-base/autotest-all to world
Done
Builds complete
Elapsed time: 41m40s
Done
(cros-chroot) yuta@yuta-VirtualBox ~/trunk/src/scripts $
[/code]
イメージをビルドします。
[code language=”bash”]
cros-chroot) yuta@yuta-VirtualBox ~/trunk/src/scripts $ ./build_image
↓↓↓↓↓↓↓↓↓↓↓↓↓↓↓↓↓↓↓↓↓↓↓↓↓↓↓↓↓↓↓↓↓↓↓↓↓↓↓↓↓↓↓↓↓↓
INFO : Running /home/yuta/trunk/src/scripts/generate_au_zip.py -o /home/yuta/trunk/src/build/images/x86-generic/0.13.563.2011_06_02_0128-a1 for generating AU updater zip file
2011/06/02 01:46:51 – generate_au_zip.py – ERROR : file = /home/yuta/trunk/src/platform/vboot_reference/scripts/image_signing/convert_recovery_to_ssd.sh does not exist
Failed generating AU zip file – ignoring Error…
Done. Image created in /home/yuta/trunk/src/build/images/x86-generic/0.13.563.2011_06_02_0128-a1
Chromium OS image created as chromiumos_base_image.bin
Developer image created as chromiumos_image.bin
Elapsed time: 18m25s
To copy to USB keyfob, do something like:
./image_to_usb.sh –from=../build/images/x86-generic/0.13.563.2011_06_02_0128-a1 –to=/dev/sdX
To convert to VMWare image, INSIDE the chroot, do something like:
./image_to_vm.sh –from=../build/images/x86-generic/0.13.563.2011_06_02_0128-a1 –board=x86-generic
from the scripts directory where you entered the chroot.
(cros-chroot) yuta@yuta-VirtualBox ~/trunk/src/scripts $
[/code]
完了しました、下記ディレクトリにイメージが出来上がったので次はUSBに書き込んで起動確認します。
[code language=”bash”]
~/chromiumos/src/build/images/x86-generic
[/code]
boxにWebdavでアクセス失敗する人はURLを確認してください。
「https://www.box.com/dav」と「https://app.box.com/dav」ではアクセスできませんでした。
「https://dav.box.com/dav」です。
iPhoneで50GBの容量をGETできると話題のオンラインストレージBoxですが、とりあえずNexus 5でBoxのアプリを入れてみたらLGのデバイスでも50GBプレゼントキャンペーンが適応されました。
思わぬところで50GBのオンラインストレージが手に入ったので、VPSのファイルバックアップ先としてWebDAV利用してみます。
試した環境は「さくらのVPS 2G」と「ServersMan@VPS」です。
まずはdavfs2が必要なのでrpmforgeからインストールします。
[code language=”bash”]
[root@vp52 ~]# rpm –import http://apt.sw.be/RPM-GPG-KEY.dag.txt
[root@vp52 ~]# rpm -ivh http://pkgs.repoforge.org/rpmforge-release/rpmforge-release-0.5.3-1.el6.rf.x86_64.rpm
http://pkgs.repoforge.org/rpmforge-release/rpmforge-release-0.5.3-1.el6.rf.x86_64.rpm を取得中
準備中… ########################################### [100%]
1:rpmforge-release ########################################### [100%]
[root@vp52 ~]#
[/code]
davfs2をインストールします。
[code language=”bash”]
[root@vp52 ~]# yum install -y davfs2
Loaded plugins: fastestmirror
・・・・・・・・・・・・・
・・・・・・・・・・・・・省略・・・・・・・・・・・・・
・・・・・・・・・・・・・
Dependencies Resolved
===============================================================================================================
Package Arch Version Repository Size
===============================================================================================================
Installing:
davfs2 x86_64 1.4.6-1.el6.rf rpmforge 218 k
Installing for dependencies:
libproxy x86_64 0.3.0-4.el6_3 base 39 k
libproxy-bin x86_64 0.3.0-4.el6_3 base 8.2 k
libproxy-python x86_64 0.3.0-4.el6_3 base 8.4 k
neon x86_64 0.29.3-3.el6_4 base 119 k
pakchois x86_64 0.4-3.2.el6 base 21 k
Transaction Summary
===============================================================================================================
Install 6 Package(s)
・・・・・・・・・・・・・
・・・・・・・・・・・・・省略・・・・・・・・・・・・・
・・・・・・・・・・・・・
Installed:
davfs2.x86_64 0:1.4.6-1.el6.rf
Dependency Installed:
libproxy.x86_64 0:0.3.0-4.el6_3 libproxy-bin.x86_64 0:0.3.0-4.el6_3 libproxy-python.x86_64 0:0.3.0-4.el6_3
neon.x86_64 0:0.29.3-3.el6_4 pakchois.x86_64 0:0.4-3.2.el6
Complete!
[root@vp52 ~]#
[/code]
Boxをマウントするディレクトリを作成します。
[code language=”bash”]
[root@vp52 ~]# mkdir /var/box
[/code]
とりあえずBoxをマウントできるかテスト
[code language=”bash”]
[root@vp52 ~]# mount -t davfs https://www.box.com/dav /var/box/
Please enter the username to authenticate with server
https://www.box.com/dav or hit enter for none.
Username: *******@gmail.com
Please enter the password to authenticate user *******@gmail.com with server
https://www.box.com/dav or hit enter for none.
Password:
/sbin/mount.davfs: Mounting failed.
302 Found
[root@vp52 ~]#
[/code]
Boxのwebdavのマウント失敗。。。
302 Foundリダイレクトされてる??
ブラウザで確認してみると、https://www.box.com/davからhttps://app.box.com/davへリダイレクトされていました。
https://www.box.com/davは古いのかな?
app.box.comでマウントの再チャレンジ
[code language=”bash”]
[root@vp52 ~]# mount -t davfs https://app.box.com/dav /var/box/
/sbin/mount.davfs: Mounting failed.
404 Not Found
[root@vp52 ~]#
[/code]
app.box.comでもwebdavのマウントできませんでした。。。
今度は404 Not Found
ここまで来て始めてBoxのオンラインヘルプページを見てアクセスURLが「https://dav.box.com/dav」だということを知る。
[code language=”bash”]
[root@vp52 ~]# mount -t davfs https://dav.box.com/dav /var/box/
Please enter the username to authenticate with server
https://dav.box.com/dav or hit enter for none.
Username: *******@gmail.com
Please enter the password to authenticate user *******@gmail.com with server
https://dav.box.com/dav or hit enter for none.
Password:
[root@vp52 ~]#
[/code]
BoxをWebDAVでマウントできた。
Boxのアカウント情報をdavfs2に設定する。
[code language=”bash”]
[root@vp52 ~]# vi /etc/davfs2/secrets
# /home/otto/.davfs2/certs/private/otto.crt geheim
# otto_private.crt "this is extraordinary secret"
# "otto private.crt" this\ is\ secret,\ too.
https://dav.box.com/dav メールアドレス パスワード
[/code]
ロックファイルを作らないようにdavfs2.confのuse_locksを0に設定する。
[code language=”bash”]
[root@vp52 ~]# cat /etc/davfs2/davfs2.conf
# use_locks 1
use_locks 0
# lock_owner <user-name>
[/code]
Boxを自動でマウントしたいのでfstabへ記載する。
[code language=”bash”]
[root@vp52 ~]# cat /etc/fstab
none /dev/pts devpts rw,gid=5,mode=620 0 0
none /dev/shm tmpfs defaults 0 0
https://dav.box.com/dav /var/box davfs rw,user,noauto 0 0
[root@vp52 ~]#
[/code]
※マウントに失敗した理由※
Box.comのWebDAVのURLはいろいろなブログで「https://www.box.com/dav」、「https://app.box.com/dav」など紹介されていましたが、自分がマウント成功したのは「https://dav.box.com/dav」でした。